OREO CHOCOLATE CHIP COOKIES
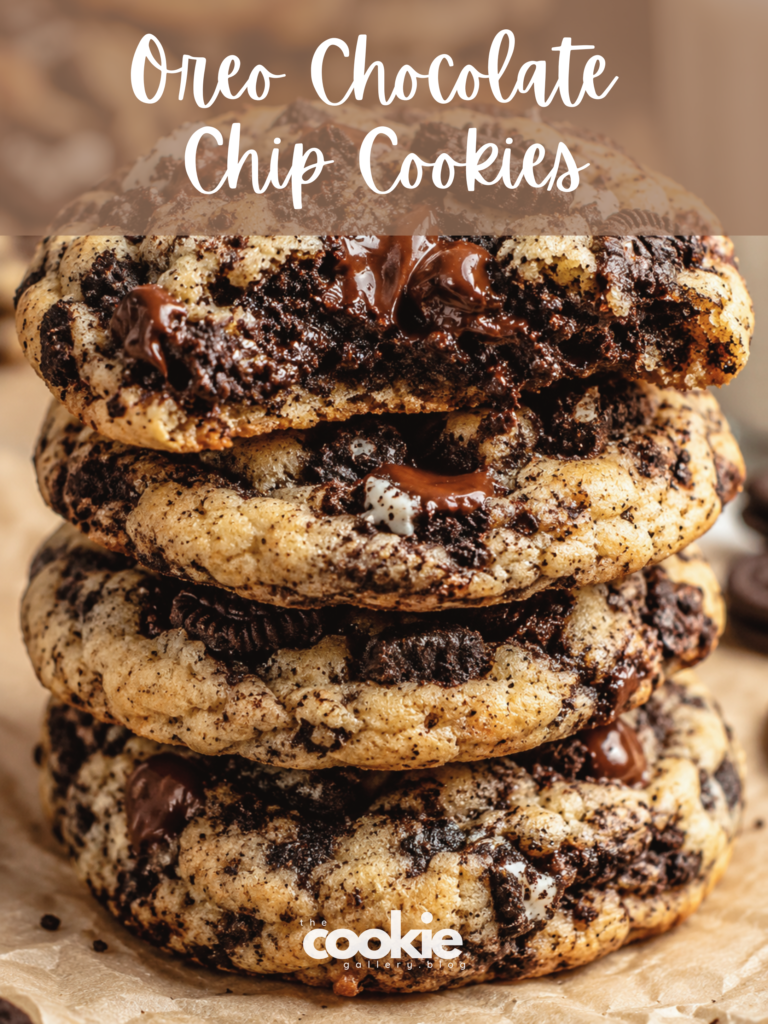
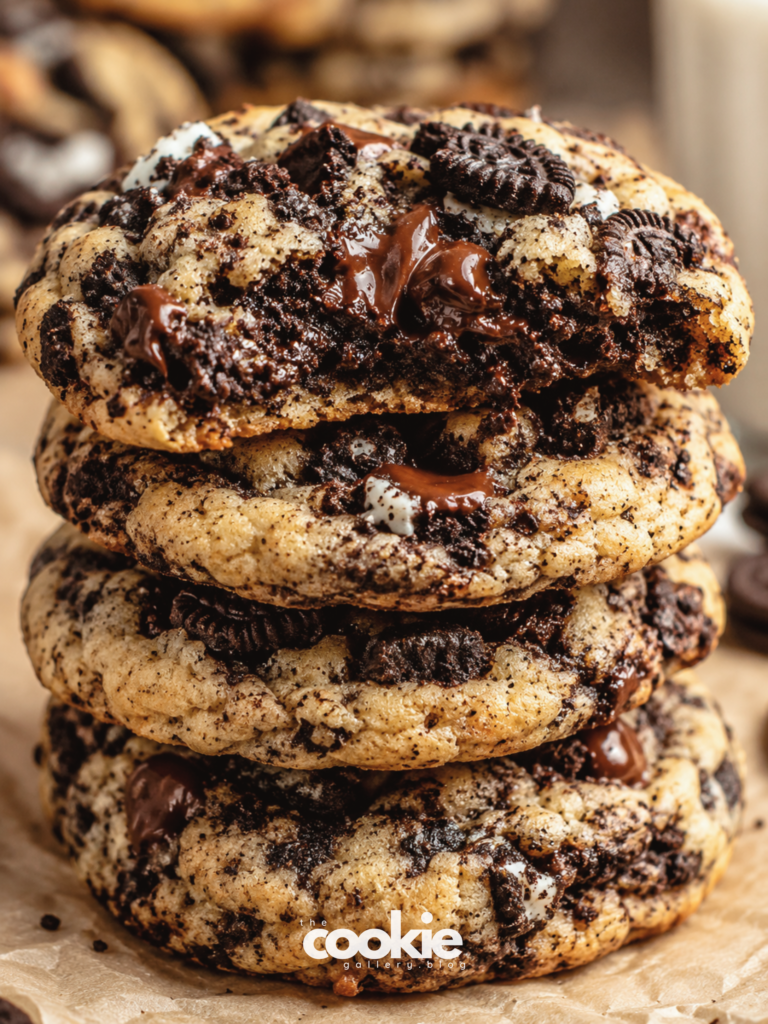
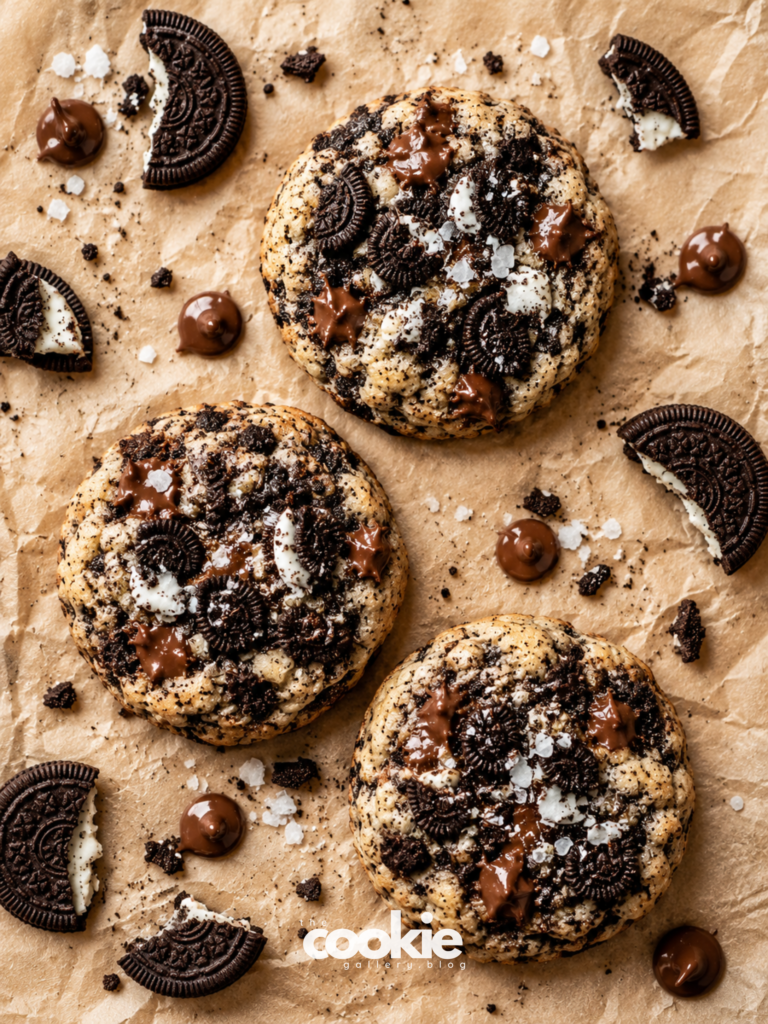
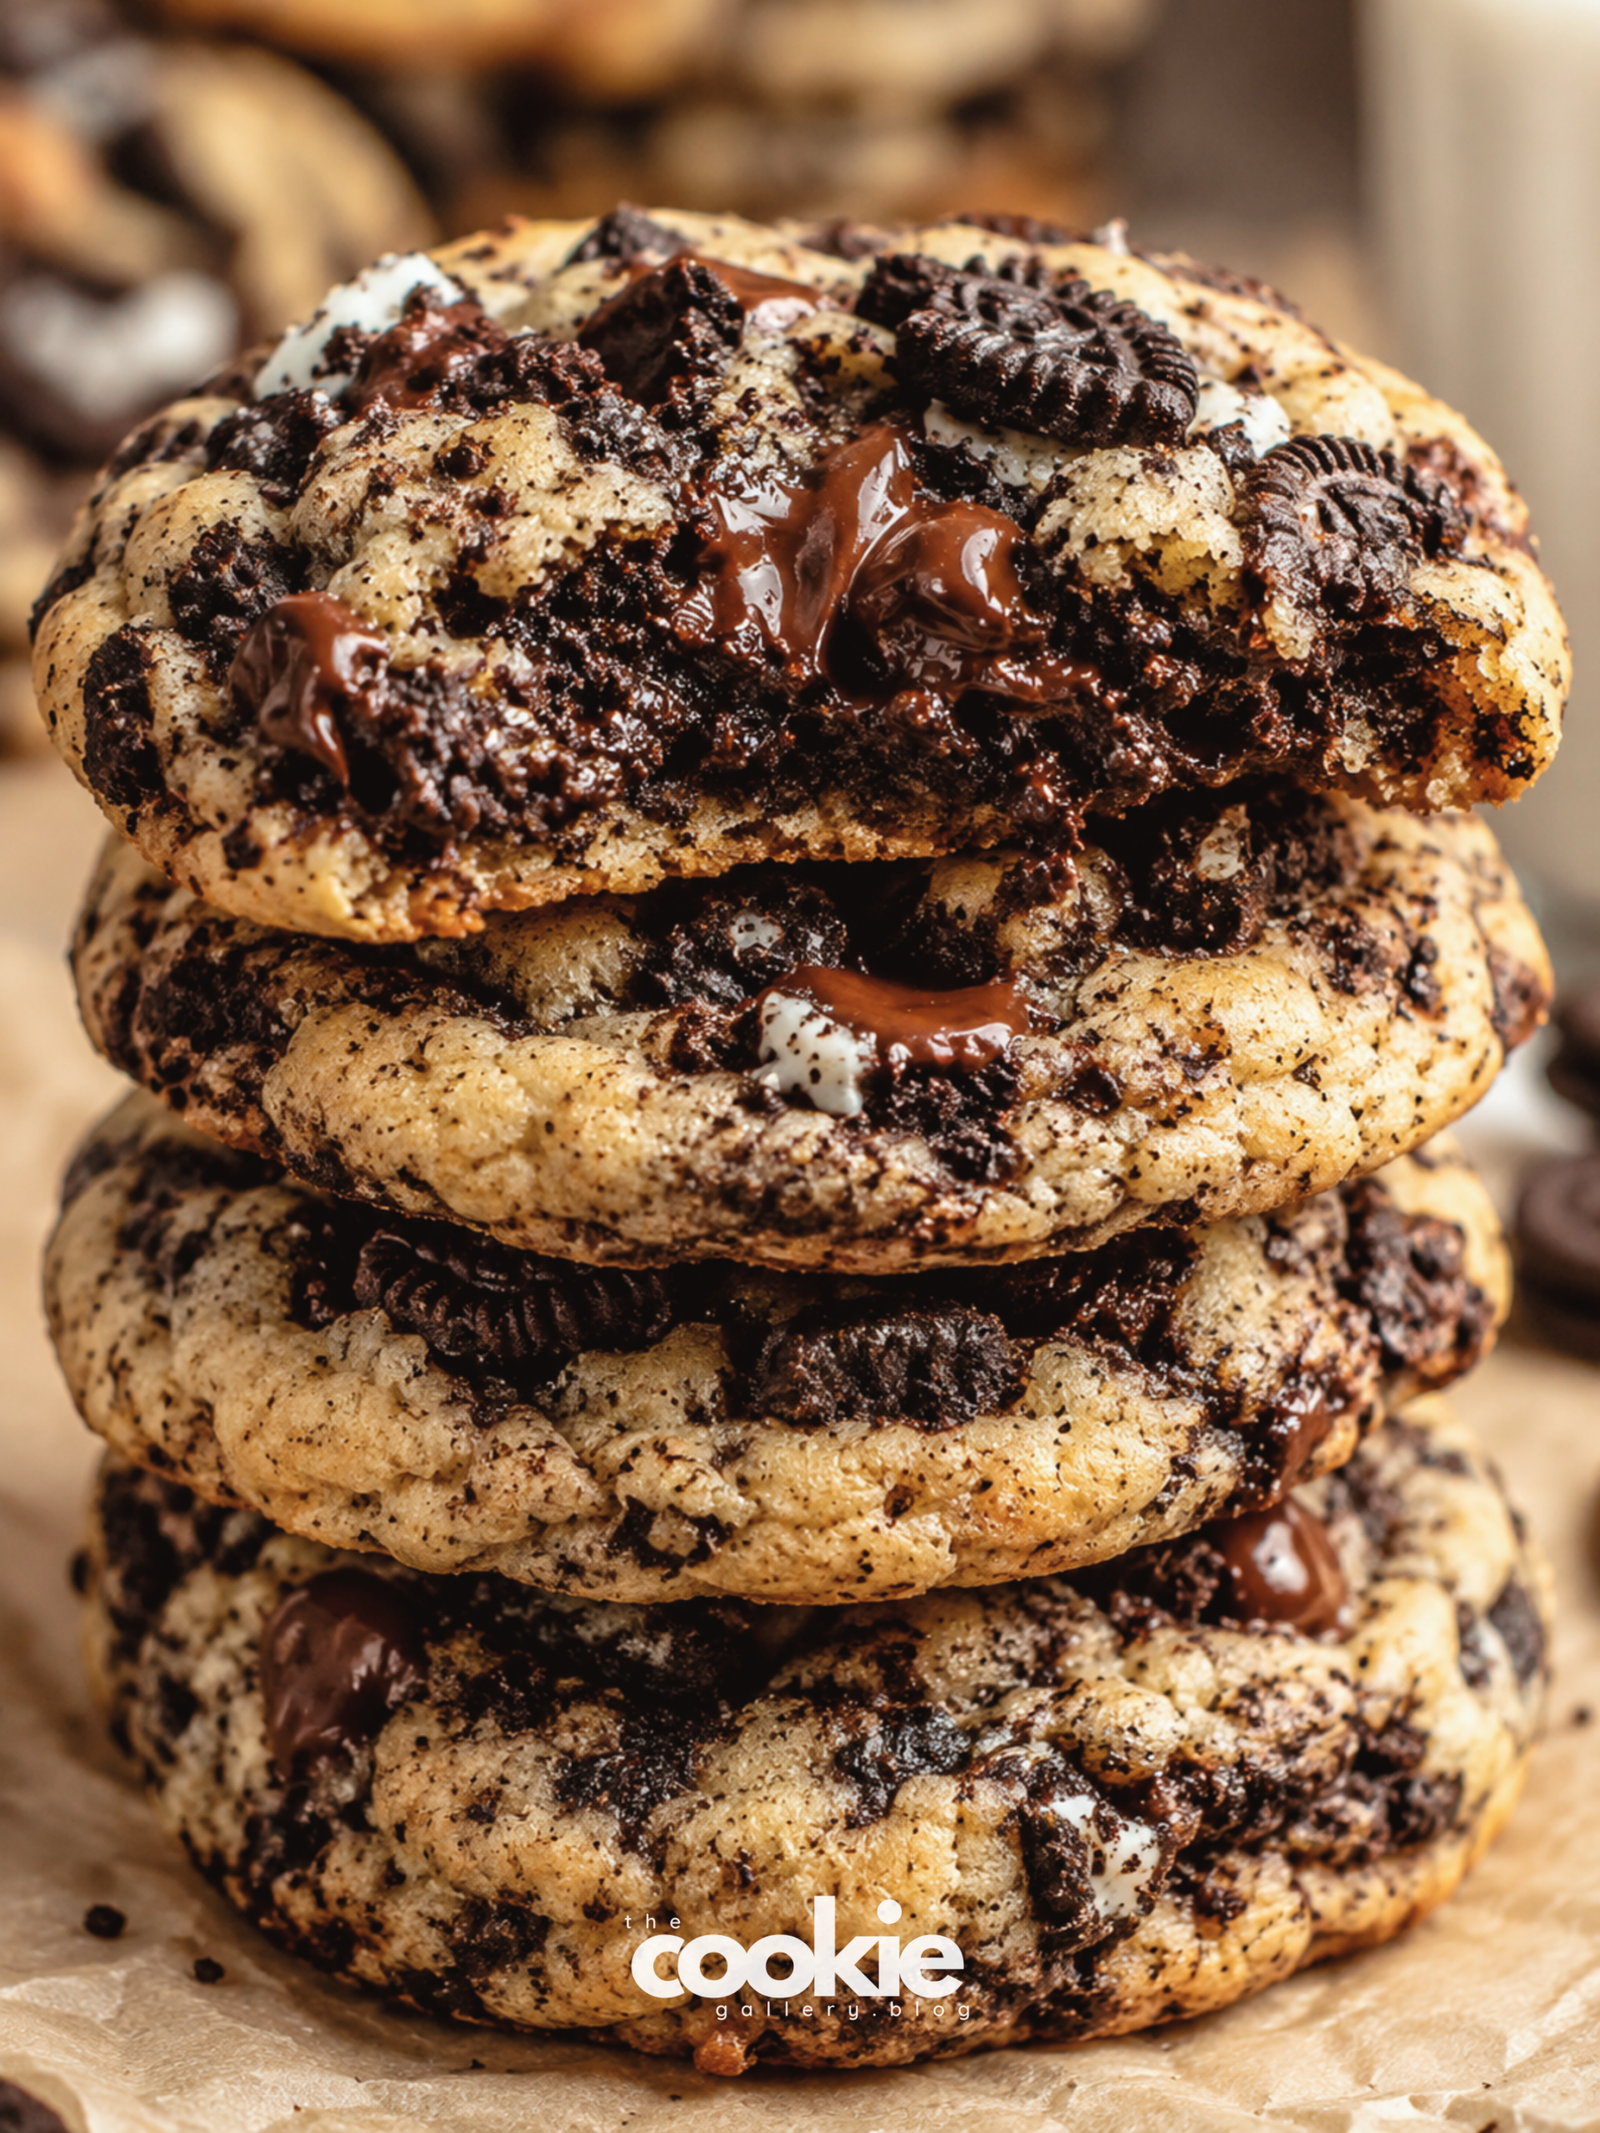
Two iconic cookies, one unforgettable bite. These Oreo Chocolate Chip Cookies combine nutty brown butter dough, rich semi sweet chocolate, and crunchy Oreo chunks in every single cookie.
Prep Time: 20 minutes | Cook Time: 10-12 minutes
Total Time: 1 hour 35 minutes (includes chilling)
Yield: 18-20 cookies | Difficulty: Easy
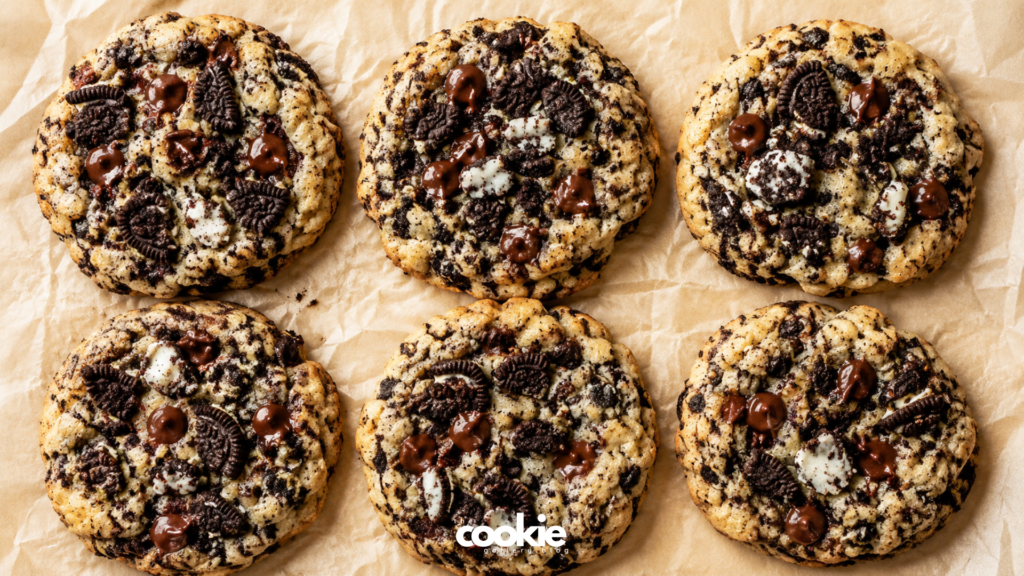
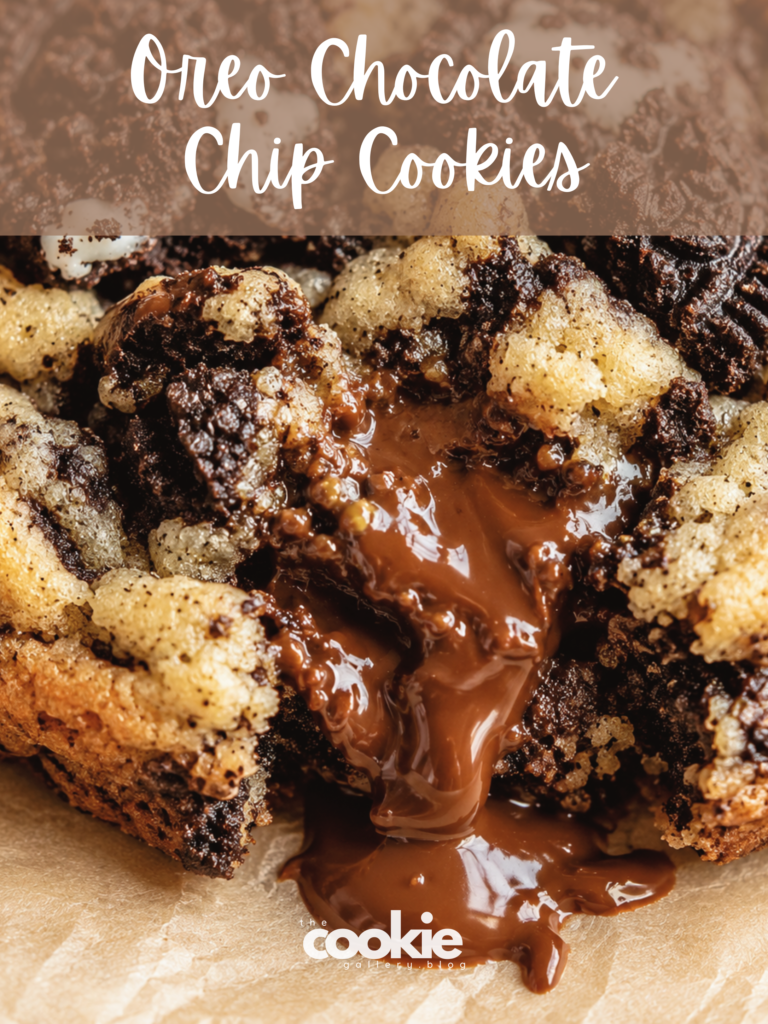
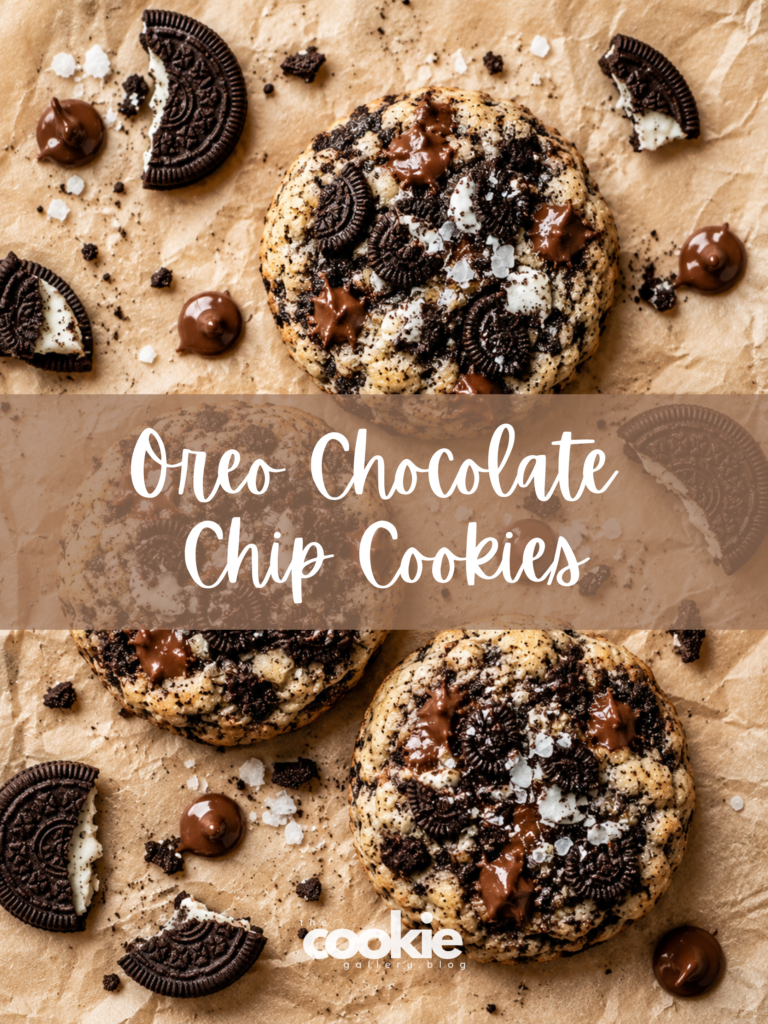
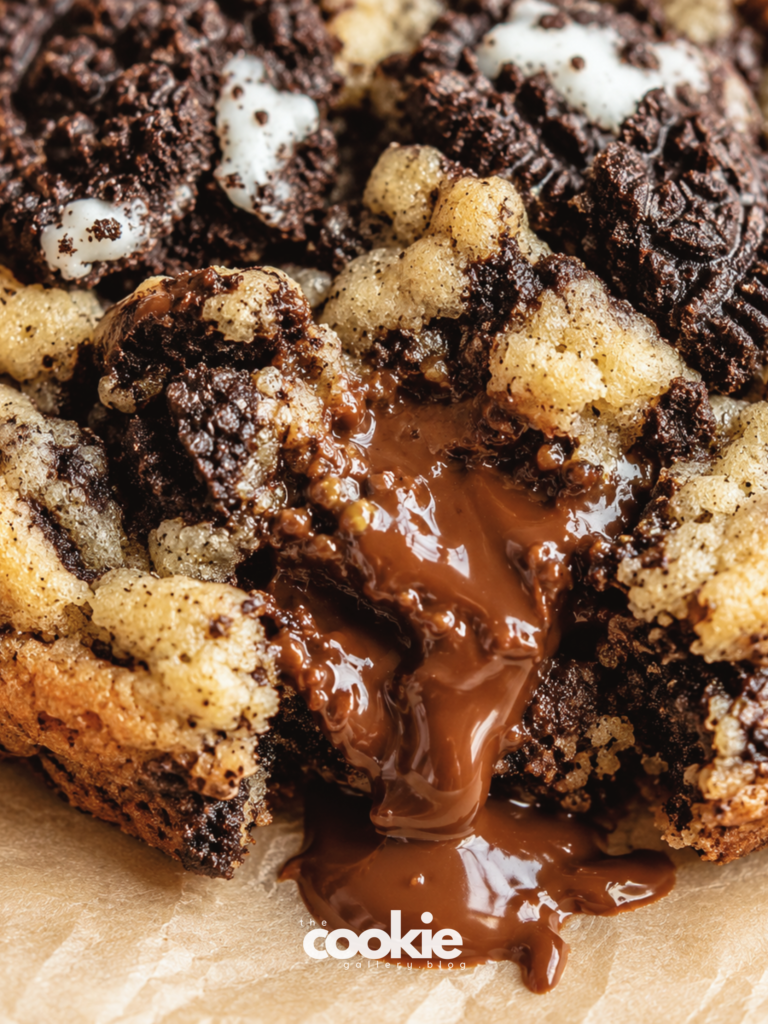
These Oreo Chocolate Chip Cookies are exactly what they sound like, the perfect marriage of two beloved treats. Made with nutty browned butter, packed with melty semi-sweet chocolate morsels, and loaded with crunchy Oreo cookie pieces, every bite delivers a soft, chewy center with crisp edges and layers of chocolatey texture. Whether you are a chocolate chip cookie purist looking for something new or an Oreo lover wanting to switch things up, this recipe is for you. The browned butter adds a depth you cannot get from regular butter, the Oreo crumbs melt into the dough for that unmistakable flavor, and the chocolate chips provide gooey pockets of richness. Best of all? This is a beginner-friendly recipe that yields bakery-worthy cookies every single time.
MORE COOKIE RECIPES
Popular Recipes
Tiramisu Cookies with Mascarpone Cream
White Chocolate Raspberry Cookies
Best Brown Butter Cookie Fries
Biscoff Chocolate Chip Cookies
RECIPE SNAPSHOT
| Flavor | Warm, nutty, chocolatey, with hints of vanilla and Oreo |
| Texture | Crispy edges, soft and chewy centers, crunchy Oreo chunks |
| Difficulty | Easy (perfect for beginner bakers) |
| Chill Time | 1 hour minimum (overnight recommended) |
| Freezer Friendly | Yes! Freeze unbaked dough balls for up to 3 months |
| Best Chocolate | Semi-sweet chocolate chips or chunks (60-70% cacao) |
| Dietary Notes | Contains dairy, eggs, and gluten. No nuts unless added. |

WHY YOU WILL LOVE THIS RECIPE
- Bakery Style Texture: Crispy edges, soft and chewy centers, and that beautiful crinkly top, just like your favorite bakery cookies.
- Easy to Make: No complicated techniques, no fancy equipment. Just basic mixing and a little patience.
- Beginner Friendly: With clear instructions and helpful tips, even first-time bakers will nail these cookies.
- Freezer Friendly: Make a double batch and freeze half for fresh cookies whenever the craving strikes.
- The Perfect Mashup: If you cannot decide between chocolate chip cookies and Oreos, this recipe gives you both.
- Brown Butter Magic: That nutty, toasty depth takes these cookies from good to unforgettable.
- Texture Heaven: Soft dough, melty chocolate, and crunchy Oreo pieces in every bite. Your taste buds will thank you.
MY BAKING STORY
I have always been a chocolate chip cookie person. The kind who has a go-to recipe memorized and can whip up a batch in my sleep. But I am also someone who loves to experiment, to take something familiar and ask, “What if?”
So when I looked at a package of Oreos and a bowl of browned butter, I started wondering. What if I crushed those Oreos up and folded them into my favorite chocolate chip cookie dough? What if the browned butter brought out the chocolatey notes in the Oreos? What if the crunch of the Oreo pieces added a whole new texture dimension?
The first batch was a happy accident. I had a half used package of Oreos sitting in my pantry and a craving for cookies. I crushed the Oreos with a rolling pin, folded them into my brown butter chocolate chip cookie dough, and hoped for the best.
What came out of the oven was so much better than I expected. The cookies were soft and chewy, with melty chocolate and crunchy Oreo pieces in every bite. The browned butter added that warm, nutty depth that made them taste like something from a fancy bakery. My family devoured them in minutes and asked for more.
I have made these cookies dozens of times since then, tweaking the ratios and testing different Oreo varieties. This is the version I keep coming back to, the one that balances the Oreo flavor with the classic chocolate chip cookie foundation. It is the cookie I bring to parties, the cookie I gift during the holidays, and the cookie I eat when I need a little comfort.
I hope these Oreo Chocolate Chip Cookies become a favorite in your kitchen too. They are proof that sometimes the best ideas come from asking, “What if?”
WHY THIS RECIPE WORKS
This recipe is built on baking science that ensures perfect cookies every time.
The Browned Butter Difference
Browned butter is the secret weapon here. When you cook butter until the milk solids turn golden and nutty, you create hundreds of new flavor compounds that regular butter simply cannot provide. This nutty, toasty depth adds warmth and complexity to the cookies without overwhelming the other flavors. Browned butter also has less water than regular butter (because we cooked it off), which means less spreading in the oven and a thicker, chewier cookie, perfect for holding all those Oreo chunks.
The Oreo Strategy
Oreos are a dry cookie, which is actually a good thing in this recipe. When you crush them, the fine crumbs absorb some of the moisture from the dough, helping to create that perfect chewy texture. The larger chunks stay crunchy because they do not absorb as much moisture. This dual-texture approach is what makes these cookies so interesting, you get soft, chewy dough with little bursts of crunch.
The Chill Factor
Chilling the dough is non-negotiable. Here is why:
- Flavor Development: The flour fully hydrates, deepening the flavor of both the browned butter and the Oreo crumbs. This is why overnight chilling produces even better cookies.
- Spread Control: Chilled dough spreads less in the oven, giving you thick, tall cookies instead of thin, flat discs.
- Texture: Chilling solidifies the butter, which prevents the cookies from becoming greasy or overly dense.
The Sugar Balance
This recipe uses both brown sugar and granulated sugar, and each has a job:
- Brown Sugar: Adds moisture, chewiness, and a hint of molasses warmth that complements the browned butter beautifully.
- Granulated Sugar: Helps with spreading and creates those slightly crisper edges.
Together, they create the perfect texture, soft and chewy in the center with just enough structure to hold all those Oreo chunks.
The Chocolate Choice
Semi-sweet chocolate chips or chunks (60-70% cacao) are the perfect choice here. They provide a rich, balanced sweetness that does not compete with the Oreos. If you use milk chocolate, the cookies might be too sweet. If you use dark chocolate (70%+), the bitterness might overpower the other flavors. Semi-sweet hits the sweet spot.
INGREDIENT SPOTLIGHT
1. Browned Butter
This is where the magic starts. Browned butter adds a nutty, toasty, caramelized depth that plain butter cannot replicate. It is the foundation of this cookie, the thing that makes people ask, “What IS that flavor?”
Pro Tip: Use a light colored saucepan so you can see the color change. As soon as you see golden brown specks and smell that nutty aroma, pour the butter into a bowl immediately to stop the cooking process.
2. Brown Sugar
Brown sugar is not just for sweetness, it adds moisture and a hint of molasses warmth that pairs beautifully with the browned butter. It is what gives these cookies their soft, chewy texture. Make sure your brown sugar is fresh and soft, not hard and clumpy.
3. Chocolate Chips vs. Chocolate Chunks
Both work, but they give different results. Chips hold their shape, giving you defined pockets of chocolate. Chunks melt into irregular puddles, creating those beautiful, gooey swirls. I recommend a mix of both for the best texture.
4. Oreos
Regular Oreos are my preference for this recipe. Double Stuff is sweeter and can make the cookies slightly softer. If you use Double Stuff, consider reducing the sugar slightly. For best results, use a mix of fine crumbs and larger chunks, the fine crumbs melt into the dough, while the chunks stay crunchy.
5. Salt
Do not skip the salt. It balances the sweetness of the sugar and Oreos and brings out the richness of the browned butter. I recommend fine sea salt for even distribution.
EQUIPMENT NEEDED
- Light colored saucepan (for browning butter)
- Hand mixer or stand mixer with paddle attachment
- Large mixing bowls
- Medium mixing bowl
- Whisk
- Rubber spatula
- Cookie scoop or tablespoon (2-tablespoon size)
- Rolling pin (for crushing Oreos)
- Zip-top bag (for crushing Oreos)
- Baking sheets
- Parchment paper
- Wire cooling rack
- Kitchen scale (optional but recommended for accuracy)
INGREDIENTS
1. For Browning:
- ½ cup (113g / 1 stick) unsalted butter
2. Wet Ingredients:
- ¾ cup (150g) light brown sugar, packed
- ¼ cup (50g) granulated sugar
- 1 large egg, room temperature
- 1½ teaspoons vanilla extract
3. Dry Ingredients:
- 1½ cups (190g) all-purpose flour (spooned and leveled)
- ½ teaspoon baking soda
- ½ teaspoon fine sea salt
4. Mix-ins:
- 1 cup (175g) semi-sweet chocolate chips or chunks
- 1 cup (about 100g) Oreo cookies, coarsely crushed (about 8-10 whole Oreos)

Ingredient Notes:
- Flour: Spoon flour into your measuring cup and level with a knife. Scooping directly from the bag packs in too much flour and will make your cookies dry.
- Butter: Use unsalted butter so you can control the salt level. Salted butter varies by brand and can lead to inconsistent results.
- Egg: Room temperature egg is crucial for proper creaming. Leave it on the counter for 30 minutes before starting.
- Oreos: Regular Oreos are preferred. If using Double Stuff, reduce sugar slightly to balance the sweetness.
STEP BY STEP INSTRUCTIONS
Step 1: Brown the Butter
Place ½ cup (113g) unsalted butter in a light-colored saucepan over medium heat. Let it melt completely, then continue cooking as it foams and bubbles. Swirl occasionally. Watch for golden brown specks to form at the bottom and a nutty aroma to develop. Once it reaches a medium amber color, immediately remove from heat and pour into a large heat safe bowl. Let cool for 10-15 minutes. It should still be liquid but not hot to the touch.
Baker’s Tip: Do not walk away while browning butter. The transition from perfect to burnt happens in seconds. Use a light colored pan so you can see the color change clearly.
Step 2: Whisk Dry Ingredients
In a medium bowl, whisk together the 1½ cups (190g) flour, ½ teaspoon baking soda, and ½ teaspoon salt. Whisk for 30 seconds to aerate and combine. Set aside.
Step 3: Cream Butter and Sugars
To the bowl with the cooled browned butter, add the ¾ cup (150g) brown sugar and ¼ cup (50g) granulated sugar. Beat with a hand mixer or stand mixer on medium speed until well combined and slightly fluffy, about 2-3 minutes. The mixture should look smooth and creamy.
Baker’s Tip: Set a timer for 3 minutes. Proper creaming creates air pockets that help the cookies puff up in the oven. Do not rush this step.
Step 4: Add Egg and Vanilla
Add the room temperature egg and 1½ teaspoons vanilla extract. Beat until smooth and glossy, stopping to scrape down the sides and bottom of the bowl as needed. The mixture should look uniform and slightly lighter in color.
Step 5: Combine Dry Ingredients
With the mixer on low speed, gradually add the dry ingredients to the wet ingredients. Mix just until combined and no flour streaks remain. Stop immediately. Overmixing will develop gluten and make your cookies tough.
Baker’s Tip: Switch to a rubber spatula for the final few folds. This gives you more control and prevents overmixing.
Step 6: Crush the Oreos
Place the Oreos in a zip-top bag and crush with a rolling pin or the bottom of a heavy pan. You want a mix of fine crumbs and larger chunks, both will serve different purposes in the cookie.
Step 7: Add Mix-ins
Remove the bowl from the mixer and switch to a rubber spatula. Gently fold in the 1 cup (175g) chocolate chips and the crushed Oreos until just evenly distributed. Do not overwork the dough.
Step 8: Chill
Cover the dough and refrigerate for at least 1 hour, or up to 3 days. This step is essential for flavor development and spread control.
Baker’s Tip: Overnight chilling produces the best flavor. The flour fully hydrates, and the browned butter flavor deepens significantly.
Step 9: Preheat and Prep
When you are ready to bake, preheat your oven to 350°F (175°C) with the rack in the middle position. Line two baking sheets with parchment paper.
Step 10: Scoop
Scoop the dough into 2-tablespoon sized balls (about 35g each). Roll gently between your palms to smooth. Place on the prepared baking sheets, spacing them about 2 inches apart.
Step 11: Bake
Bake for 10-12 minutes, or until the edges are set and lightly golden. The centers will still look soft that is exactly what you want.
Baker’s Tip: Rotate your baking sheet halfway through for even baking. If baking two sheets at once, switch racks and rotate sheets halfway through.
Step 12: Cool
Let the cookies cool on the baking sheet for 5-10 minutes. They will continue setting up during this time. Then transfer to a wire rack to cool completely, or enjoy warm.
Step 13: Serve and Enjoy
Serve warm or at room temperature. Watch people’s faces light up when they realize what is in these cookies.
EXPERT BAKING TIPS
1. Pro Tips
- Use a Kitchen Scale: 190g flour is exact. Scooping from the bag can give you anywhere from 150g to 220g depending on how you measure. A scale guarantees consistency.
- Room Temperature Egg: Cold egg can shock the browned butter and create a grainy dough. Leave your egg on the counter for 30 minutes before starting.
- Do Not Overmix: Once the flour goes in, mix just until it disappears. Overmixing develops gluten, which makes cookies tough instead of tender.
- Chill the Dough: One hour minimum. Overnight is even better. Do not skip this step.
2. Texture Tips
- For Thicker Cookies: Chill the dough for at least 2 hours and do not flatten the dough balls before baking.
- For Chewier Cookies: Use more brown sugar than granulated sugar (which this recipe already does) and pull the cookies out at 10 minutes.
- For Crispier Cookies: Use more granulated sugar and bake for the full 12 minutes.
3. Appearance Tips
- For Round Cookies: Immediately after baking, place a round cookie cutter slightly larger than the cookie around it and swirl gently. Work quickly while the cookies are hot.
- For Bakery Style Tops: Reserve some Oreo crumbs and chocolate chips. Press them gently onto the tops of the dough balls before baking.
- For Even Baking: Rotate your baking sheet halfway through. Ovens have hot spots.
4. Flavor Tips
- For Extra Oreo Flavor: Use 1¼ cups of crushed Oreos and reduce the chocolate chips to ¾ cup.
- For More Caramel Notes: Use dark brown sugar instead of light brown sugar.
- For Deeper Chocolate: Use dark chocolate chunks (60-70% cacao) instead of semi-sweet.
COMMON MISTAKES & TROUBLESHOOTING
1. Why Cookies Spread Too Much
- Butter was too warm: Browned butter should be cooled to room temperature before creaming with sugar. If it was too warm, the cookies will spread into thin discs.
- Dough was not chilled: This dough needs at least 1 hour to firm up. Skipping the chill leads to flat cookies.
- Baking sheet was too warm: If you baked multiple batches, let the sheet cool completely between batches, or use a second sheet.
- Too little flour: Measure your flour correctly. Spoon and level, do not scoop.
Fix: Chill the dough for at least 1 hour. If your kitchen is warm, chill for 2 hours. Use a kitchen scale for accurate flour measurement.
2. Why Cookies Are Dry
- Too much flour: Scooping flour directly from the bag packs in extra flour, leading to dry, crumbly cookies.
- Overbaked: Pull the cookies out at 10-12 minutes when the edges are set but the centers still look soft. They will continue baking on the hot sheet.
- Overmixed: Overmixing develops gluten, which makes cookies tough and dry.
Fix: Spoon flour into your measuring cup and level with a knife. Set a timer and pull the cookies out when they look slightly underdone. Mix just until the flour disappears.
3. Why Cookies Are Flat
- Butter was too warm: Browned butter should be cooled to room temperature.
- Dough was too warm: Chill the dough before baking.
- Baking sheet was too warm: Let the sheet cool between batches.
- Too much sugar: Did you pack your brown sugar? Packed brown sugar adds extra moisture and can cause spreading.
Fix: Let the browned butter cool for a full 10-15 minutes. Chill the dough for at least 1 hour. Use a second baking sheet if needed.
4. Why Cookies Are Cakey
- Too much flour: Cakey cookies usually mean you added too much flour.
- Overmixed: Overmixing develops gluten and creates a cakey texture.
- Too much leavening: Did you add extra baking soda? Stick to the measurements.
Fix: Spoon and level your flour. Mix just until the flour disappears. Use the exact amount of baking soda.
5. Why Oreos Lose Their Crunch
- Baked too long: Overbaking softens the Oreo pieces.
- Too much moisture: The fine Oreo crumbs absorb moisture from the dough, which is normal. The larger chunks should stay crunchy.
Fix: Bake for the minimum time (10 minutes) and pull the cookies out while the centers are still soft. Reserve some larger Oreo chunks to press on top before baking for extra crunch.
RECIPE VARIATIONS
1. Double Chocolate Oreo Cookie
Add ¼ cup (28g) unsweetened cocoa powder to the dry ingredients. The extra chocolate makes these cookies even richer and more decadent.
2. Peanut Butter Oreo Cookie
Add ¼ cup (65g) creamy peanut butter to the wet ingredients along with the egg and vanilla. Reduce the butter to ⅓ cup to compensate for the added fat. The peanut butter and Oreo combination is absolutely divine.
3. Mint Oreo Cookie
Add ½ teaspoon of peppermint extract to the wet ingredients. Use Andes mint chips instead of semi-sweet chocolate chips. Crush mint Oreos instead of regular Oreos. Perfect for the holidays!
4. Stuffed Oreo Cookie
Instead of crushing the Oreos, place a whole Oreo in the center of each dough ball. Wrap the dough around the Oreo so it is completely covered. Bake as directed. The Oreo stays intact in the center, creating a beautiful surprise when you bite into it.
5. S’mores Oreo Cookie
Fold ½ cup of mini marshmallows and ½ cup of crushed graham crackers into the dough along with the Oreos and chocolate chips. The marshmallows melt into gooey pockets, and the graham crackers add that classic s’mores flavor.
SEASONAL VARIATIONS
- Holiday: Use holiday-themed Oreos (red cream, peppermint, etc.) and white chocolate chips.
- Spring: Add ½ cup of dried raspberries and use white chocolate chips.
- Fall: Add ½ teaspoon of cinnamon and use dark chocolate chunks.
- Summer: Use golden Oreos and add ½ cup of toasted coconut.
STORAGE & FREEZING
1. Room Temperature
Store baked cookies in an airtight container at room temperature for up to 5 days. Add a slice of bread to the container to keep them soft, replace the bread every 2 days.
2. Refrigerator
You can refrigerate baked cookies for up to 1 week. Let them come to room temperature before serving for the best texture.
3. Freezer (Unbaked Dough)
This dough freezes beautifully. After chilling, scoop the dough into balls, place them on a parchment-lined tray, and freeze until solid (about 1-2 hours). Transfer to a freezer bag. When you are ready to bake, place frozen dough balls on a baking sheet and bake at 350°F for 12-14 minutes (add 1-2 minutes to the regular bake time). No need to thaw.
4. Freezer (Baked Cookies)
Freeze baked cookies for up to 3 months. Thaw at room temperature and warm in a 300°F oven for 3-4 minutes to refresh.
MAKE AHEAD
You can make the dough up to 3 days in advance. Keep it covered in the refrigerator and bake when you are ready. The flavor actually improves with longer chilling!
REHEATING
- Oven Method: Preheat to 300°F (150°C). Warm cookies for 3-4 minutes to bring back that fresh-baked magic.
- Microwave Method: Microwave a single cookie for 8-10 seconds to soften and re-melt the chocolate.
FREQUENTLY ASKED QUESTIONS (FAQ)
1. Can I use Double Stuff Oreos?
You can, but they will be sweeter and the cream filling might make the cookies slightly softer. Regular Oreos are my preference for this recipe because they have a better cookie to cream ratio. If you use Double Stuff, consider reducing the sugar to ½ cup brown sugar and ¼ cup granulated sugar to balance the sweetness.
2. Can I use different chocolate?
Absolutely! Milk chocolate, dark chocolate, or even white chocolate all work. Dark chocolate (60-70%) is my personal favorite because it balances the sweetness of the Oreos and browned butter. If you use milk chocolate, consider reducing the sugar slightly.
3. Can I make these without browned butter?
Yes, you can use softened butter instead. But why would you? The browned butter adds so much depth and warmth to this cookie. If you skip it, the cookies will still be good, but they won’t be special. Try it once with browned butter. You will never go back.
4. Why did my cookies spread into flat discs?
Flat cookies usually happen because your browned butter was too warm, you skipped the chill, or your baking sheet was too warm. Let the browned butter cool for a full 10-15 minutes, chill the dough for at least 1 hour, and let your baking sheet cool between batches.
5. Can I add nuts to this recipe?
Absolutely! Toasted walnuts or pecans would be incredible. Add about ½ cup of chopped, toasted nuts along with the Oreos and chocolate chips. Toast them first (350°F for 5-7 minutes) to bring out their flavor.
6. Can I make these gluten-free?
You can try using a 1:1 gluten-free flour blend, but I have not tested this recipe with gluten-free flour. If you try it, let me know how it goes!
Full Printable Recipe Card

Oreo Chocolate Chip Cookies
Ingredients
Equipment
Method
- Brown the butter: Place ½ cup (113g) unsalted butter in a light-colored saucepan over medium heat. Cook until it melts, foams, and golden brown specks appear. Immediately pour into a large heat-safe bowl. Cool for 10-15 minutes.
- Whisk dry ingredients: In a medium bowl, whisk together 1½ cups (190g) flour, ½ teaspoon baking soda, and ½ teaspoon salt. Set aside.
- Cream butter and sugars: To cooled browned butter, add ¾ cup (150g) brown sugar and ¼ cup (50g) granulated sugar. Beat on medium speed for 2-3 minutes until combined and slightly fluffy.
- Add wet ingredients: Add room temperature egg and 1½ teaspoons vanilla extract. Beat until smooth and glossy, scraping bowl as needed.
- Combine: With mixer on low, gradually add dry ingredients. Mix just until no flour streaks remain. Do not overmix.
- Crush Oreos: Place Oreos in a zip-top bag and crush with a rolling pin until you have a mix of fine crumbs and chunks.
- Add mix-ins: Using a rubber spatula, fold in 1 cup (175g) chocolate chips and crushed Oreos until evenly distributed.
- Chill: Cover dough and refrigerate for at least 1 hour.
- Preheat and prep: Preheat oven to 350°F (175°C). Line baking sheets with parchment paper.
- Scoop: Scoop dough into 2-tablespoon balls (about 35g each). Place on prepared sheets, 2 inches apart.
- Bake: Bake for 10-12 minutes until edges are set and lightly golden. Centers will look soft.
- Cool: Let cookies cool on baking sheet for 5-10 minutes. Transfer to wire rack.
- Serve: Enjoy warm or at room temperature.
Notes
- Crush Oreos with Purpose: Aim for a mix of fine crumbs and larger chunks. Fine crumbs melt into the dough; chunks stay crunchy.
- Do Not Skip the Chill: This dough needs at least 1 hour to firm up. Skipping this step leads to flat cookies.
- Room Temperature Egg: Cold egg can shock the browned butter. Leave egg on the counter for 30 minutes before starting.
- Do Not Overmix: Once flour is added, mix just until combined. Overmixing makes cookies tough.
- Measure Flour Correctly: Spoon flour into measuring cup and level with a knife. Scooping packs in too much flour.
- Storage: Store in an airtight container at room temperature for up to 5 days.
- Freezer Option: Freeze unbaked dough balls for up to 3 months. Bake from frozen at 350°F for 12-14 minutes.
NUTRITION INFORMATION
Per Cookie (Based on 19 Cookies)
| Calories | 215-240 kcal |
| Fat | 11-13g |
| Saturated Fat | 7-9g |
| Carbohydrates | 28-32g |
| Fiber | 1-2g |
| Sugar | 17-20g |
| Protein | 3-4g |
| Cholesterol | 25-30mg |
| Sodium | 120-150mg |
Note: Nutrition information is an estimate and may vary based on specific ingredients used (brand of Oreos, chocolate chips, etc.).
MORE COOKIE RECIPES
Popular Recipes
Tiramisu Cookies with Mascarpone Cream
White Chocolate Raspberry Cookies
Best Brown Butter Cookie Fries
Biscoff Chocolate Chip Cookies

ABOUT THE BAKER
Hi, I’m Zach!
I am a home baker with over 6 years of experience and a deep love for browned butter. Born and raised in Lahore, Pakistan, I grew up surrounded by traditional festive sweets, but my heart always belonged to chocolate—thanks to my Baba, who would bring back suitcases full of it from his travels.
Baking became my passion when I moved to Sweden for university. What started as a way to fill my time turned into a full-blown obsession, all thanks to my husband, my official taste tester and biggest supporter.
Now living in sunny Portugal with my husband and our two cats, Milo and Mini, I am finally sharing the recipes I have perfected over the years. My not-so-secret weapon? Browned butter. Always.
I hope you enjoy these recipes and find a little sweetness in your own life.
Happy Baking!
Zach
Recipe Testing Process
This Oreo Chocolate Chip Cookie recipe went through 12 test batches before I was satisfied. I tested different Oreo-to-chocolate ratios, chill times, bake temperatures, and crushing methods. I made every mistake possible so you do not have to.
Why You Can Trust This Recipe
Every recipe on this blog is tested in a home kitchen with standard equipment and ingredients you can find at any grocery store. No fancy tools, no hard-to-find ingredients, just recipes that work.
COMMENTS & RATINGS
We would love to hear from you! Leave a comment, rate this recipe, and let us know how your Oreo Chocolate Chip Cookies turned out.